Greetings earthlings! Welcome to “How I Edit my Photos”. I’m really only going to talk about how I edit my photos right on my phone for instagram. For photography gigs, I edit with photoshop on my laptop to preserve photo resolution and have more flexibility.
Every time I start writing for my blog again, I realize how much I missed this. I’m just very comfortable in this space, writing and just sharing. Truly, thank you to everyone who said yes in my IG poll when I proposed this idea and gave me a reason to get back to it. I know you all were waiting for this because that poll actually got 100% ‘Yes’ votes, lol.

So… I am here today to deliver. Enjoy, comment, share if you found this useful. Here we go!
The Apps
This is the dynamic trio- Airbrush, Lightroom and Snapseed.
I keep all three on my phone at all times. All for Free 99. It would probably be helpful to download these apps and try out the functions on a test photo as you’re reading this, but this post will also be here whenever you need it.

I use Airbrush the least, and mostly used it when I need to maybe brighten a photo.
The ‘Magic’ function sort of knows how to fix the lighting in the right ways. It’s very slight. Even though it’s one action, the app sort of reads the photo and brighten areas that need to be brightened, if that makes sense.
I also like the face edit functions under ‘Retouch’. You can smooth out dark circles or fix your skintone (not to change your skintone but, to make look more realistic if light is a little bright or something).
If you’re not someone with a super fine eye you probably won’t care for this app much but maybe still try it out and see if you like other things about it 🤷🏾♀️.

Lightroom is the leader of the crew. Most times I just used this one.
My favorite thing about it is that you can save an edit for one photo as a preset right on the app and apply it to future photos. I probably have about ten presets at the moment that I use consistently and make very slight additional adjustments if I need. I make them for different types of photos, like food, landscapes, selfies, sunsets, my plants 😊.
For whatever reason, when I’m wearing the color pink in photos it makes the whole photo look super pink so I have a special preset for when I’m wearing pink, lol. You’ll develop your own set of presets the more you use it, based on the types of things you photograph most.
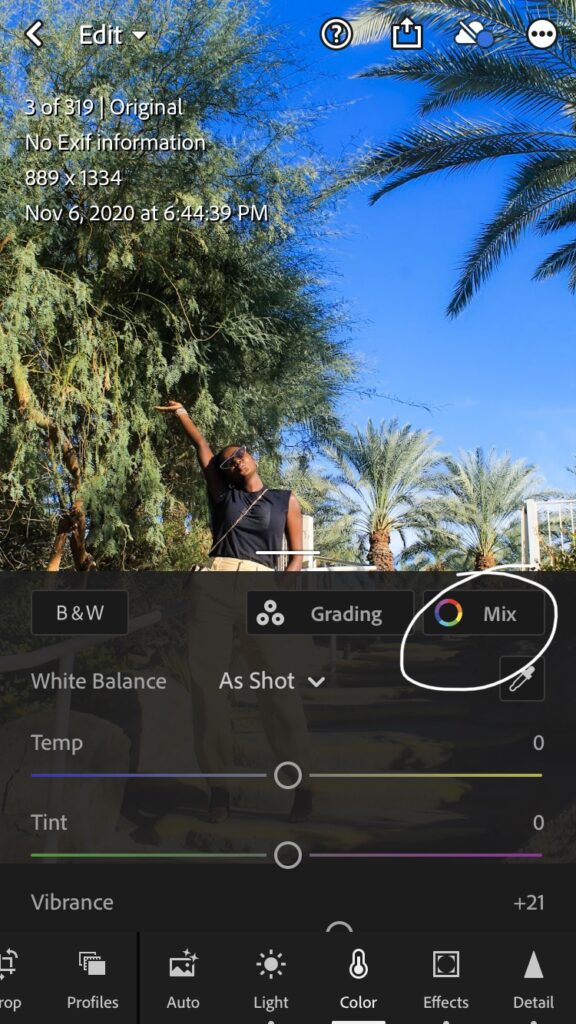
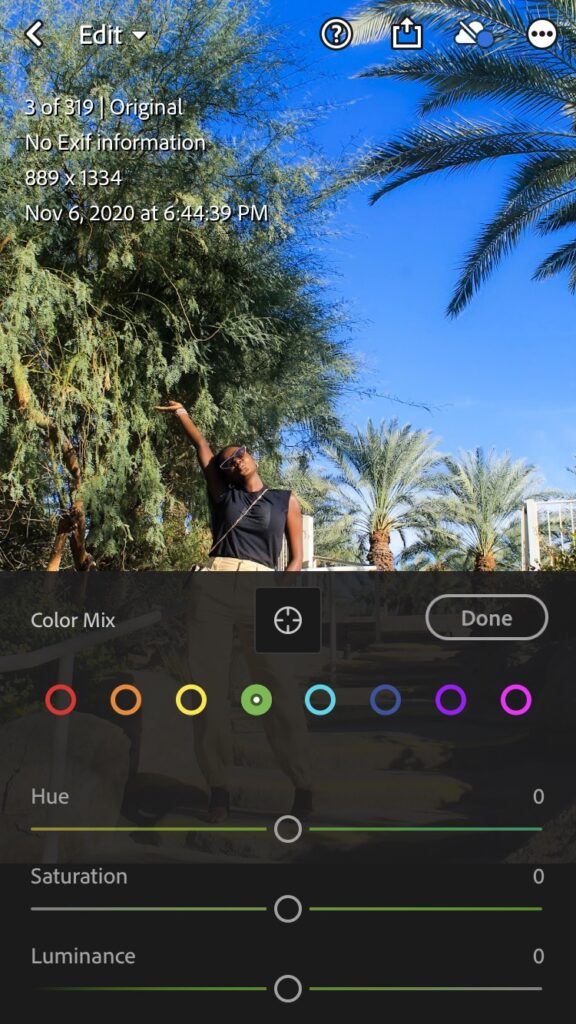
Another function I love is the ‘Color’ adjustment, you can actually adjust undertones of photos if its for example too orange because you’re standing in the sun. You can literally lower just the yellow or whichever color you feel is unnecessarily predominant.
Under’ Color’ hit ‘Mix’ and there you’ll see undertone color adjustments. Tap on one of the colors in the top row and you’ll see all the adjustments for that specific color. Below you’ll see all the adjustments for just green for example. This app is from the Gods I tell you.
I like the ‘White’ and ‘Black’ adjustment under the ‘Light’ function because I feel like they lighten or darken photoshop better than using ‘Exposure’ or ‘Contrast’. The photo still look natural in the end.
I highly recommend paying around on this app with different photos. Click on everything and see what it does. There are so many functionalities for any type of edit you might want to go for.

I used Snapseed only for a long time, before Lightroom came out with an app.
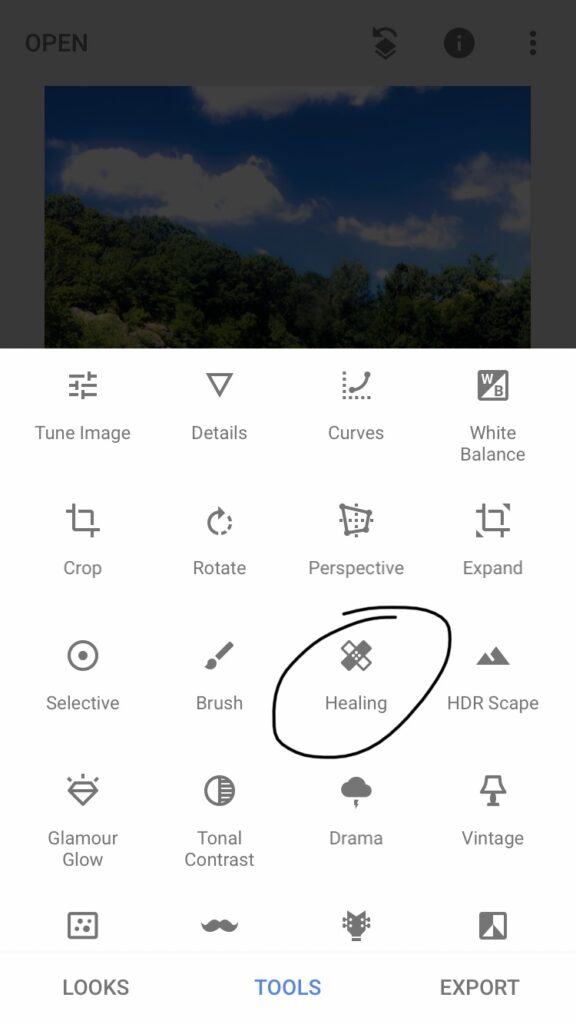
My favorite function is the ‘healing’ tool. It basically lets you erase little things you might not want in your photo. Below I removed a tiny cloud in the top left corner for example.
It also lets you adjust, brightness and saturation of certain parts of a photo by just drawing over the area you want to adjust using the ‘Brush’ tool. Sometimes you might want to make color of things around you pop but not you or your skin. You can literally draw over the things you want to adjust, see how it looks, draw over it a second time if you want certain colors to pop more.
Let’s get into some actual edits 🤗.
I pulled these right from my phone. I’ll do my best to explain the process but feel free to drop questions in the ‘comments’ below if you have any.
Here are my golden rules to start…
First, I edit photos to enhance them, as in enhance colors to make them look as vibrant as they are in real life. People can tell when you’ve edited photos of you way too much. Just don’t do it, lol.

(If I’m trying to be super instagrammy, I use a black and white filter or a filter that mutes colors to set a certain vibe but, if you follow me you know I like things to look realistic so this might be redundant.)
Second, a good camera/lens goes alongggg way. Sometimes the entire way.
Third, for pictures of yourself on IG, try to find a clean or simple background. Your life will be so much easier in the editing process.
Fourth, find good lighting. I like taking photos during the day, in a shaded area, but still well lit, or at sunset/golden hour because my skin glows. I sometimes face the sun directly but not every camera can handle it. It really depends on what the sun is doing at the moment so test it out.
Fifth, I take most photos in vertical orientation (like the photos below). I like the larger/vertical layout on IG. Sometimes when you take photos horizontally and try to enlarge them on IG to make them fit the larger layout the resolution gets ruined.
Lastly, be patient with yourself. Finding your angle, your comfort in taking photos, editing, it’s all a process. You get better the more you do it.
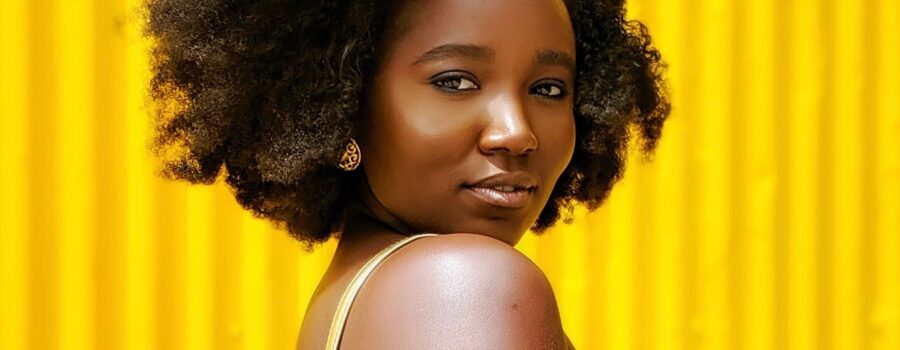
- For the photo below, you can see that I barely did anything. I just increased the saturation and brightness slightly to make the background yellow brighter, and cropped it because hair was doing thingsss, LOL, and needed to be centered.
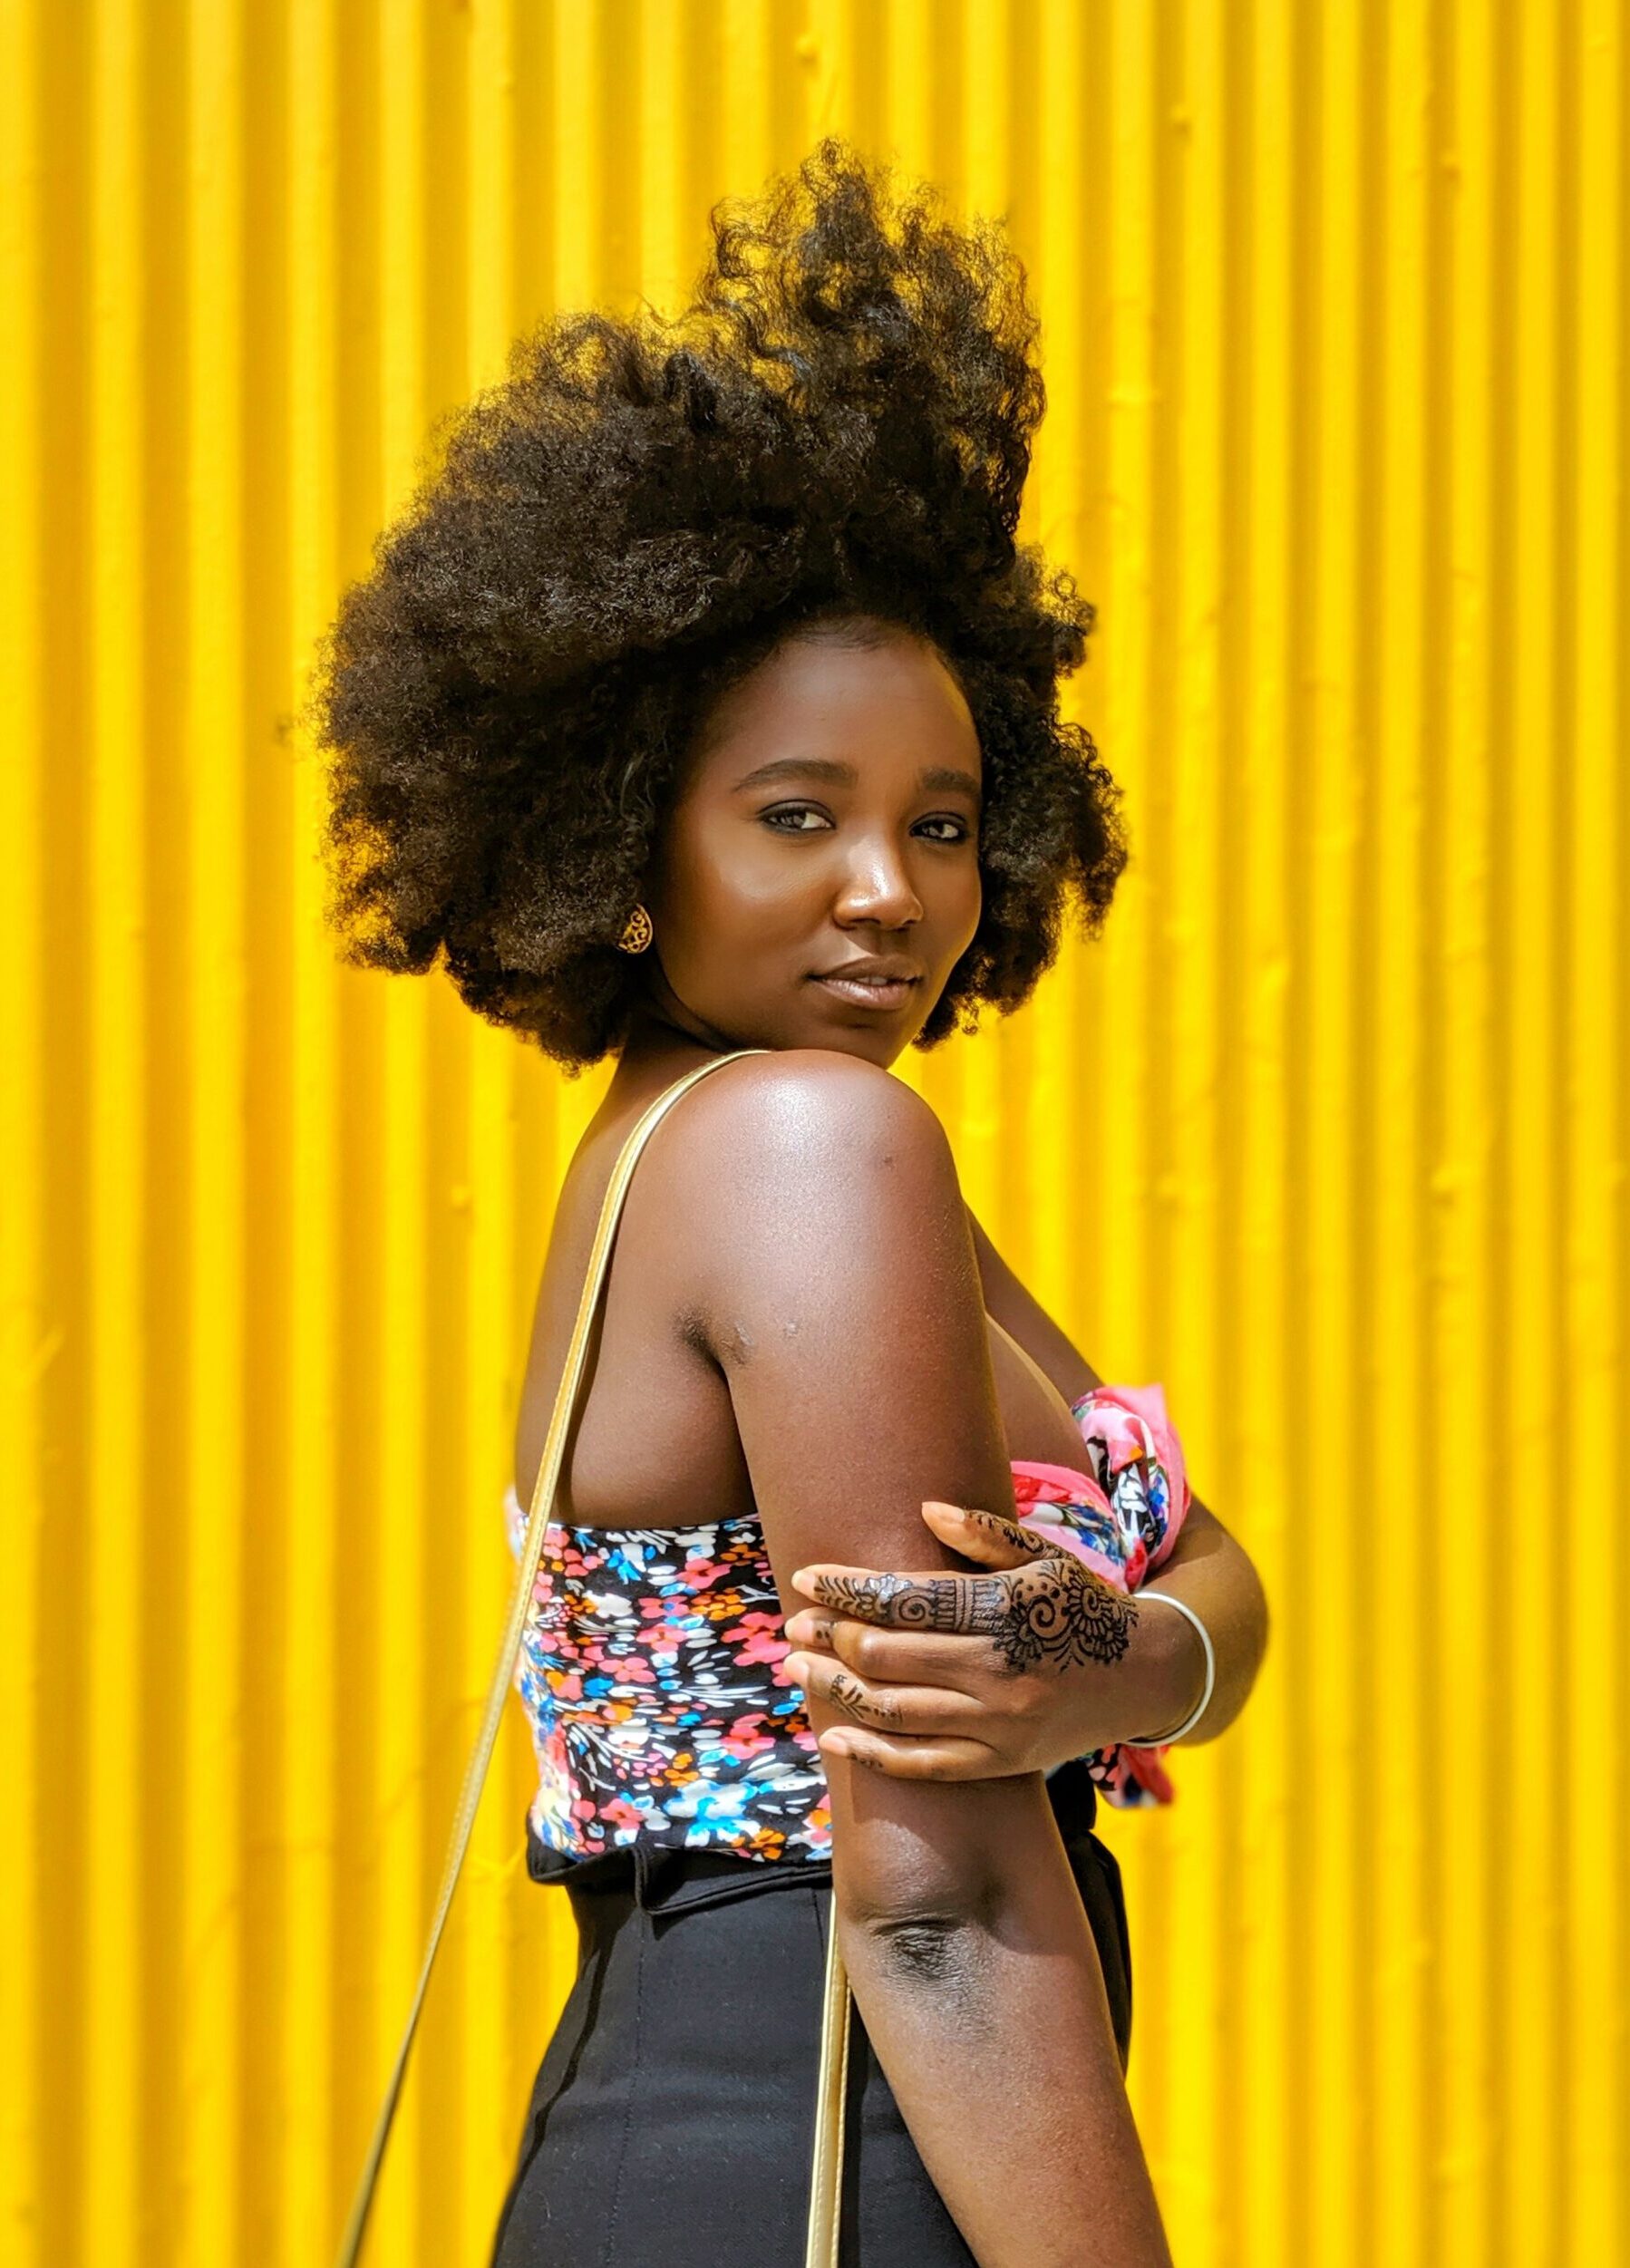
How we started… 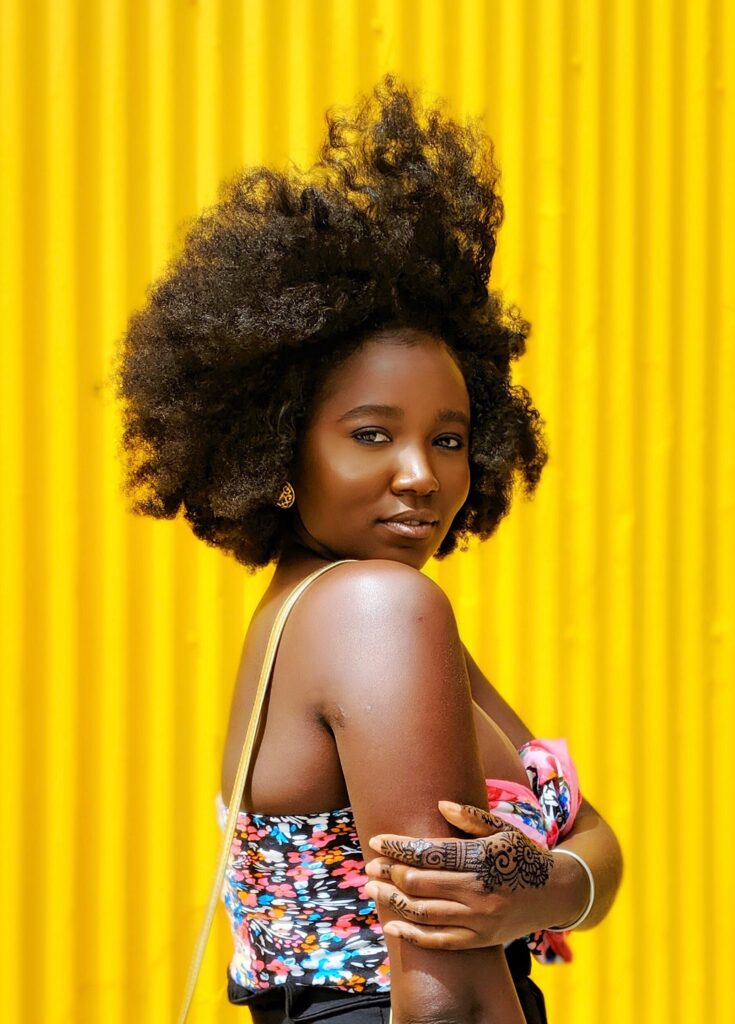
How we ended…
- For this one I think I just used that ‘Magic’ tool on Airbrush and increased brightness slightly using ‘Tools’ > ‘Enhance’ > ‘Highlights’.
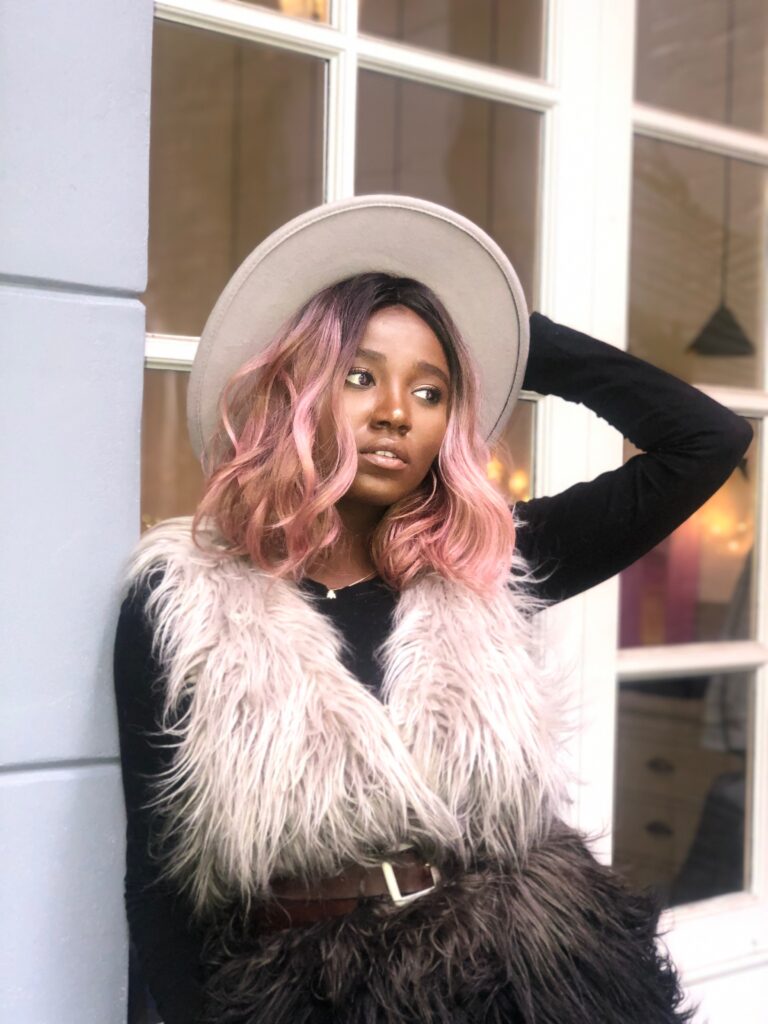
How we started.. 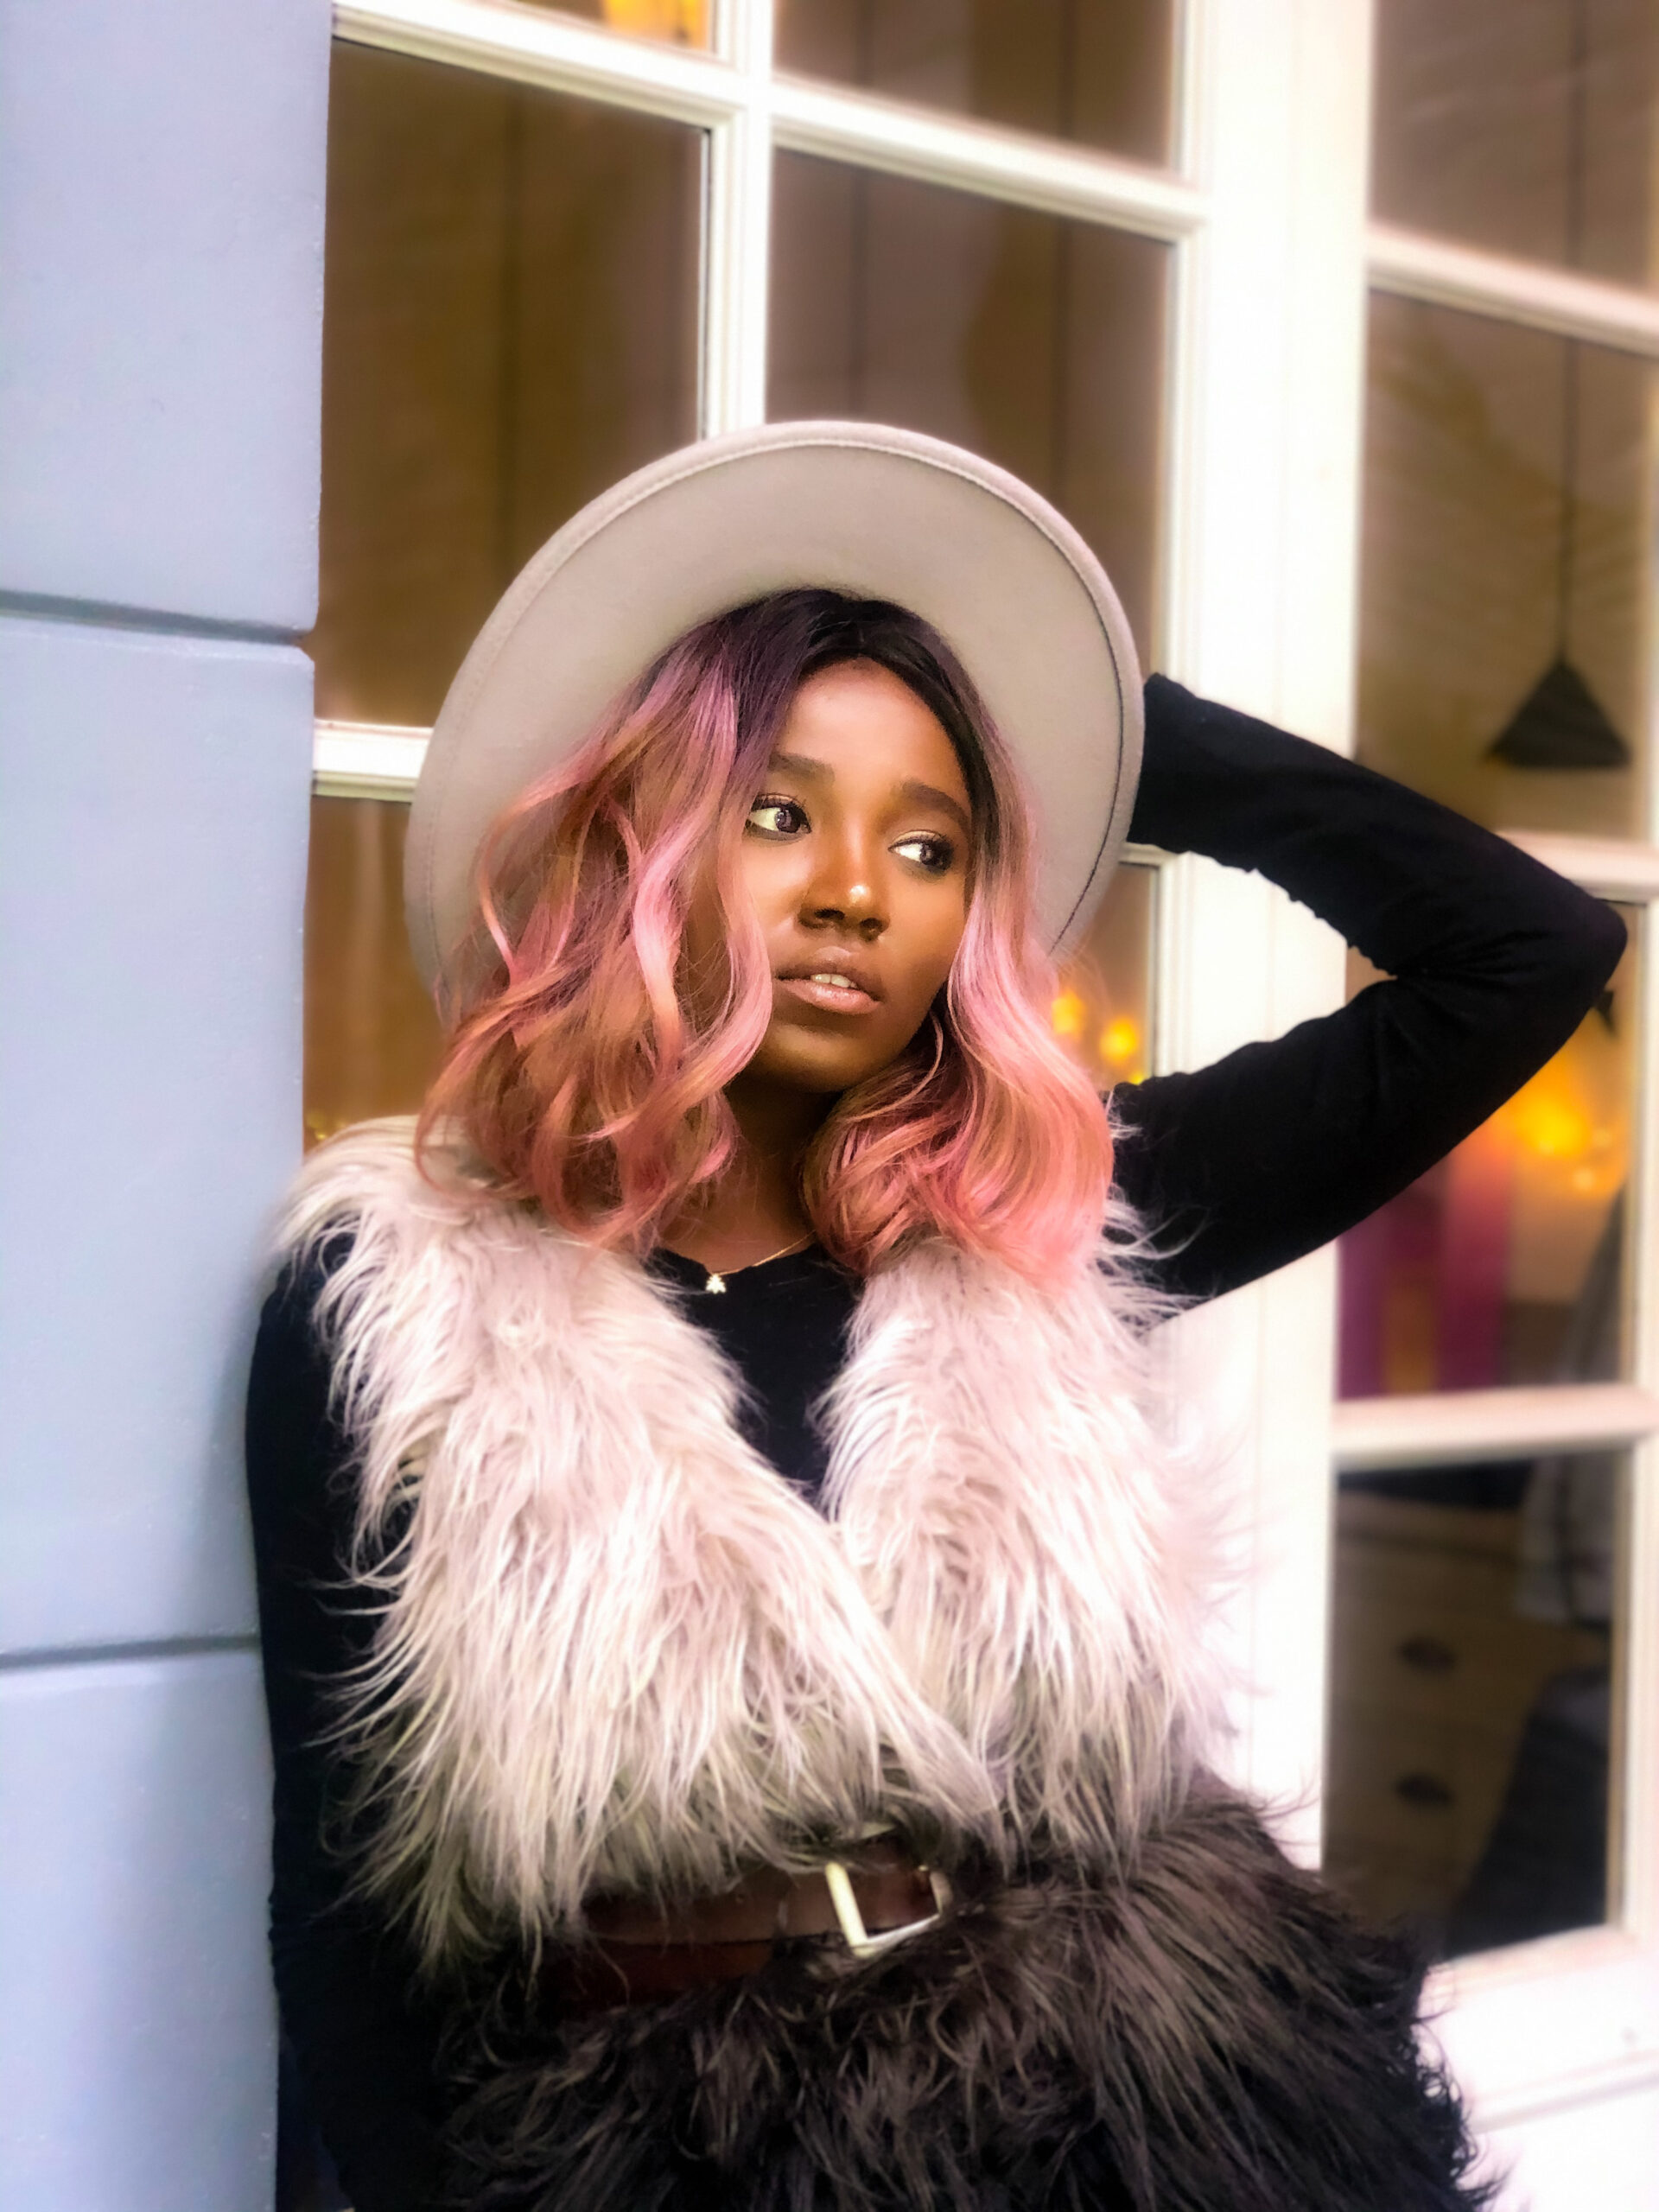
How we ended..
- I need to do this style again soon for my own amusement, lol, but I think this was all Lightroom. I slightly increased saturation and brightness.

How we started.. 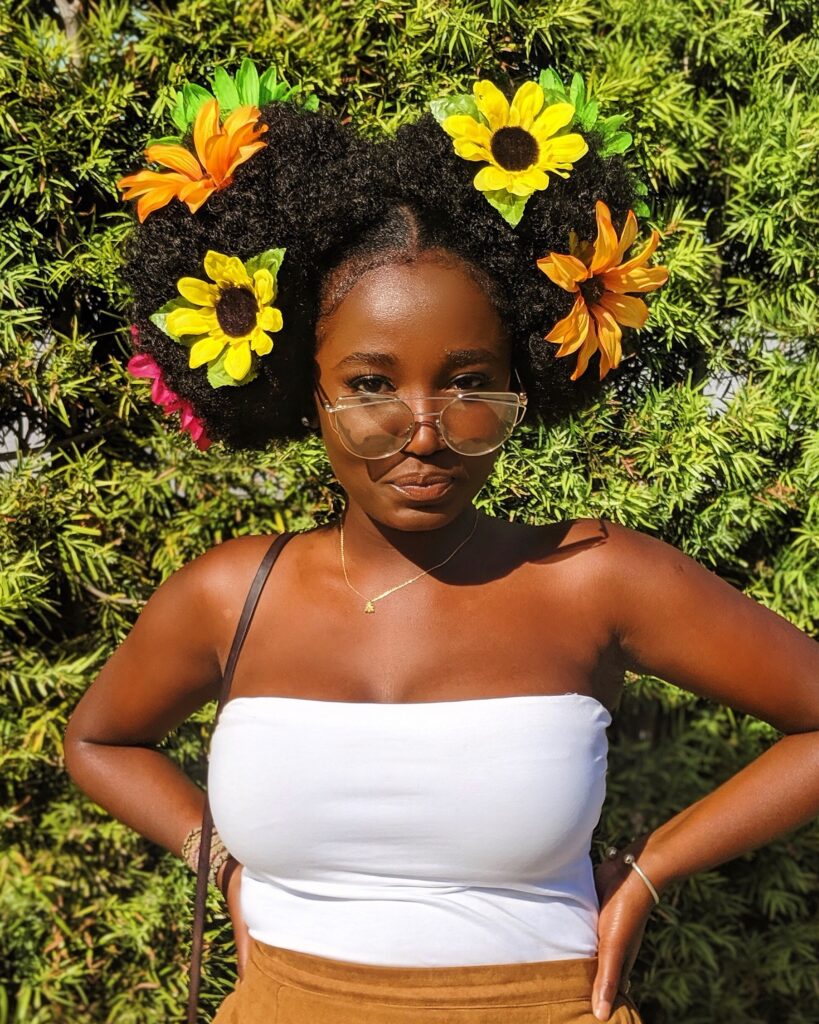
How we ended..
- This photo required a little more editing. When I increased the color vibrancy, using ‘Vibrance’ under ‘Color’ in Lightroom, the white started to look more greenish yellow. Under ‘ Mix’, I lowered the green undertone to 40 and orange undertone to 7. I also increased the the ‘ White’ under ‘Light’ to 63, and there you have it 🤗. Again, I use the ‘White’ function more in Lightroom because this function for adjusting brightness looks softer than increasing ‘Exposure’.
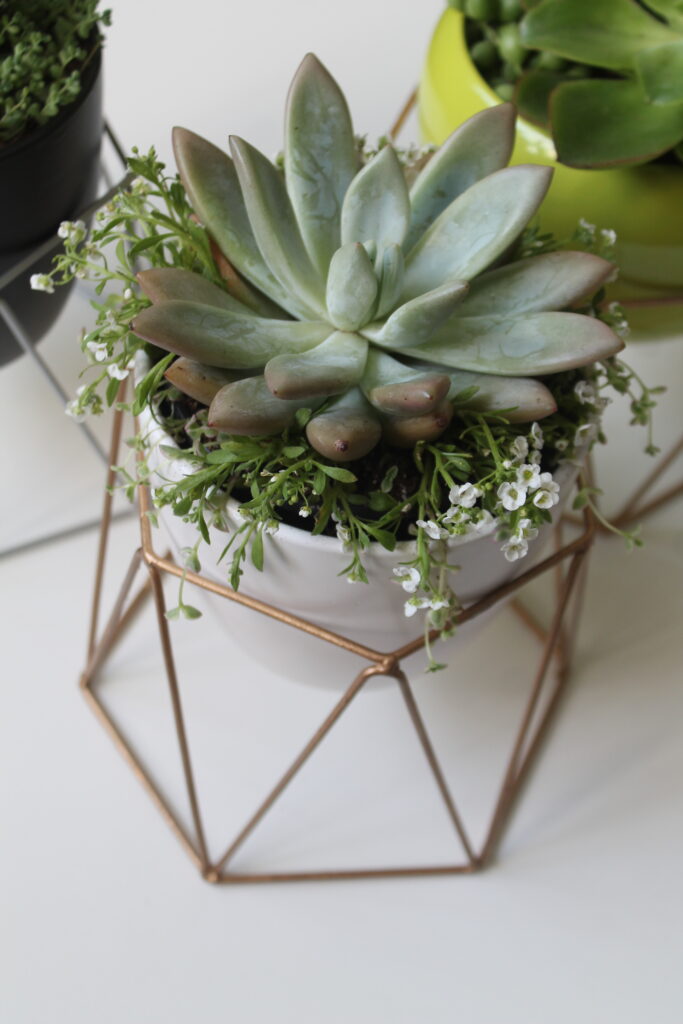
How we started… 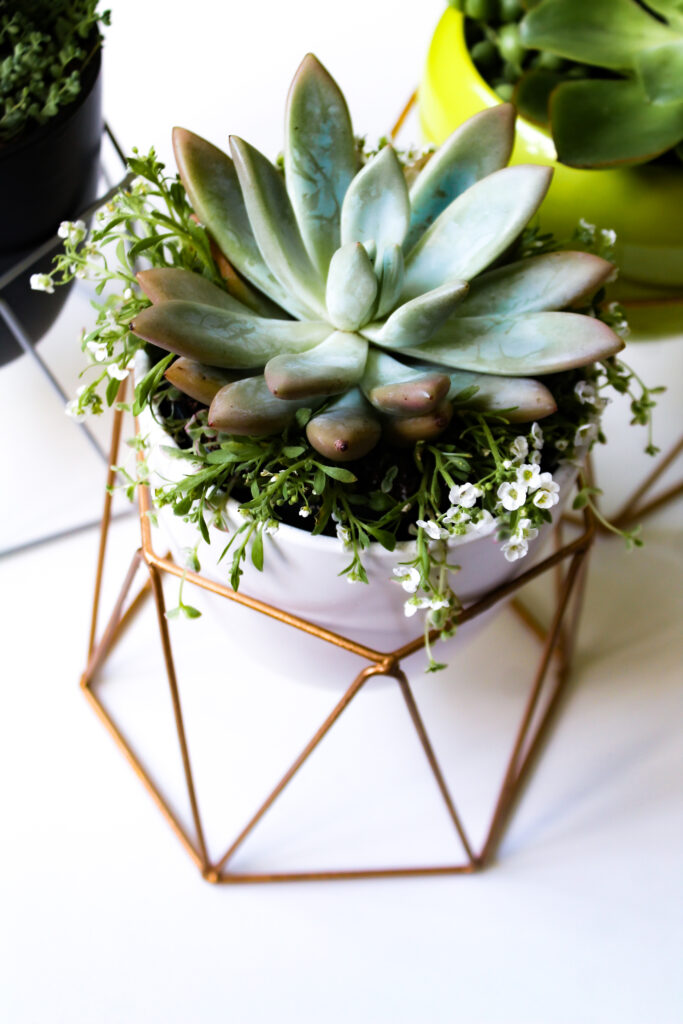
How we ended…
My fave, landscapes. When I moved to LA two years ago, my favorite thing to do was walk around. The architecture geek in my would not sit still. The diverse architecture in this city speaks to its vast history.
When it come to landscapes, if I have to do a lot, I just don’t, lol.
Not every photo is worth posting.
- The photos below were edited in Lightroom but increasing the ‘Vibrancy’, ‘Saturation’ (slightly) and ‘Exposure’ (slightly) and lowering ‘Highlights’ under ‘Light’.
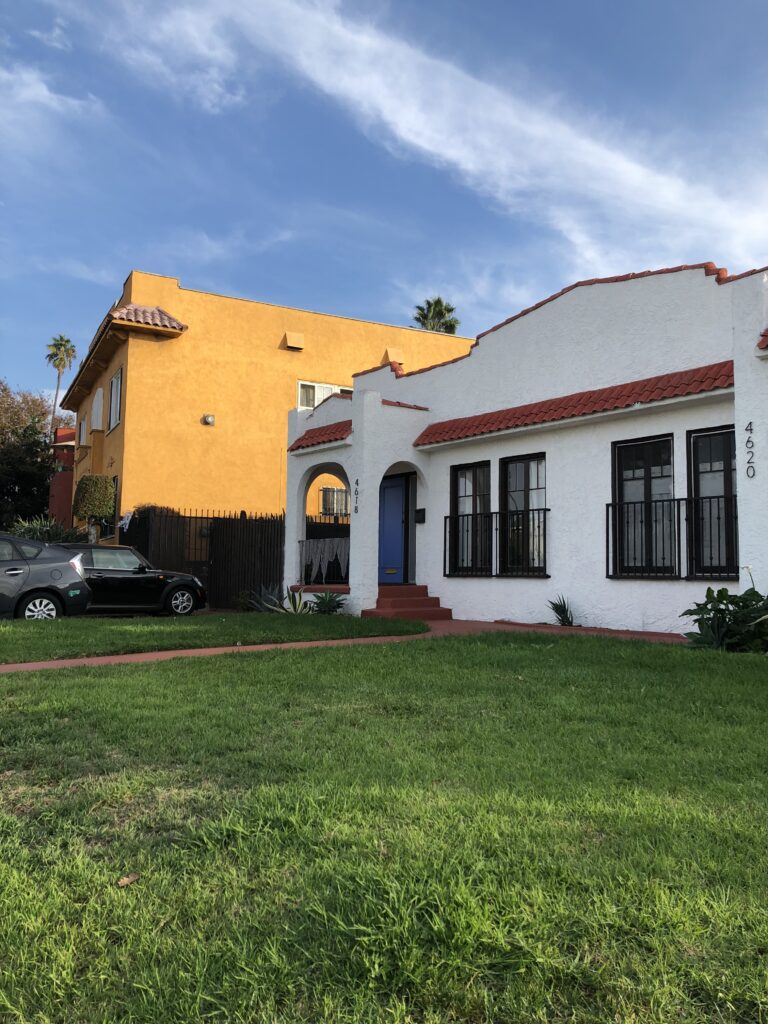
How we started… 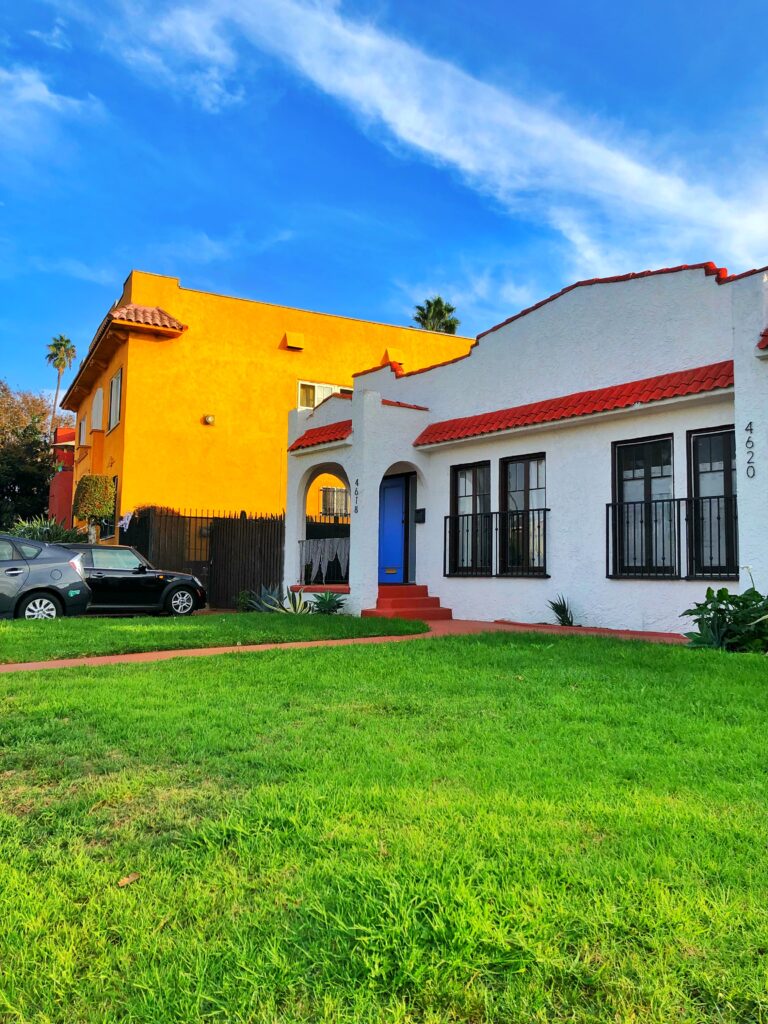
How we ended…
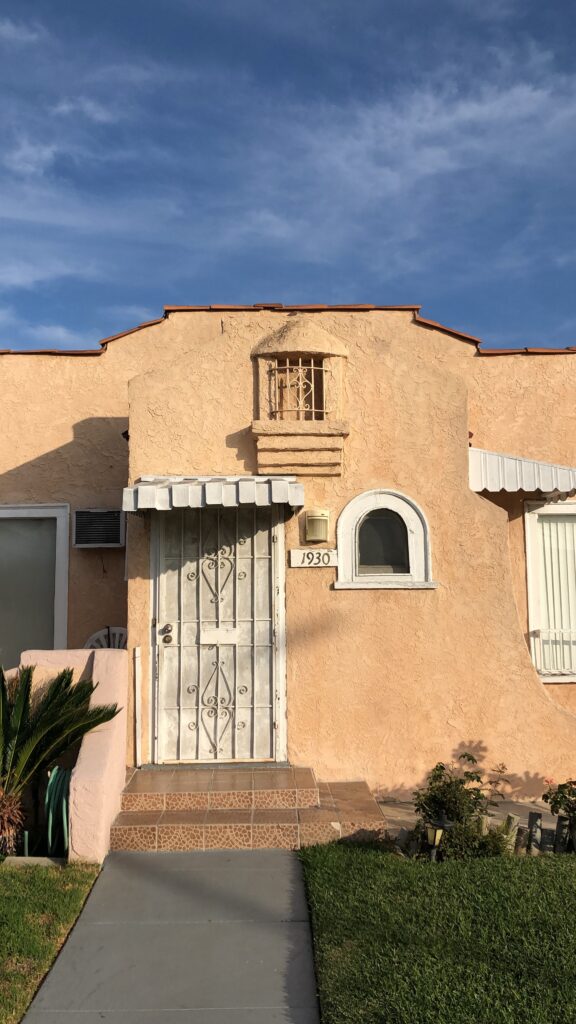
How we started… 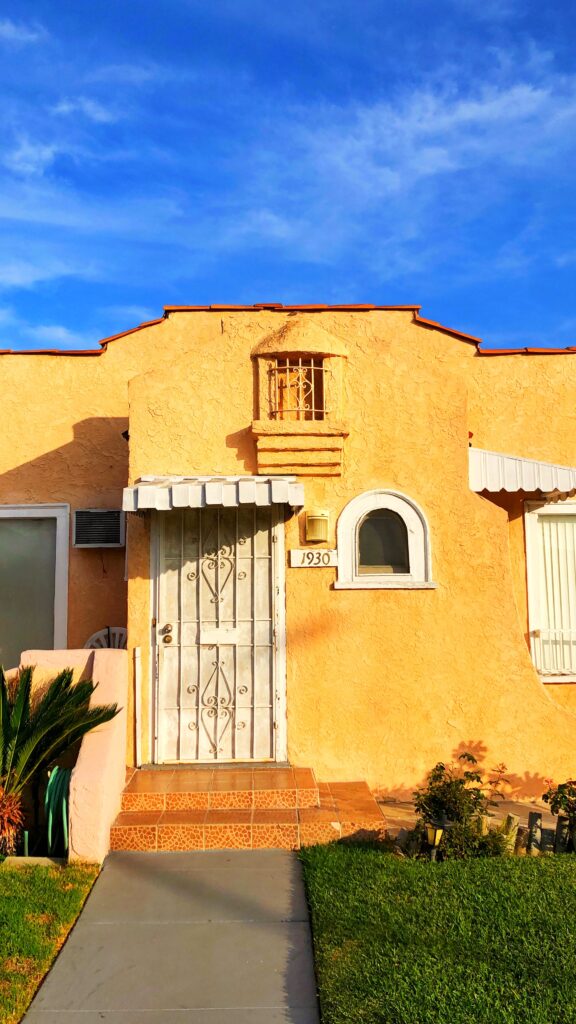
How we ended…
Here’s a little video tutorial of one of my edits!
I reverted all my edits since the photo was already edited and went through the entire editing process on Lightroom. To save as Preset I just hit the three dots at the top right corner and it ‘Create Preset.’
Let me know if this was useful, if you need more detail or drop a hi!
Now go out and be great friends.

Free free to check out other posts while you’re here! 🙂
